Requality-manual-installation » History » Revision 21
« Previous |
Revision 21/33
(diff)
| Next »
Viktoria Kopach, 05/30/2014 07:00 PM
Requality Installation
To install the latest stable version of Requality, please use the following update site:
http://forge.ispras.ru/repo/requality/site/
System requirements
- Windows and Linux (both x86 and x86-64) are supported. Please note if you use Windows x86-64, all the tools have to be x86 (32-bits), because there is no supported browser engine for Windows x86-64, that could be integrated into Eclipse.
- Sun/Oracle Java SE 6.0.
- Eclipse Platform 3.5, (3.7.2 recommended). You can use any Eclipse package ( e.g. Eclipse Standard).
- XULRunner 1.9.2.19 (currently Eclipse doesn’t support XULRunner 2.0 and later). For Linux you can use WebKit instead of XULRunner.
- EGit (recommended), Subversive or any other Eclipse Team Provider — it depends on your version control system.
| Dependency | Min version | Recommended version | Windows x86, x86-64 | Linux x86 | Linux x86-64 |
|---|---|---|---|---|---|
| Sun/Oracle Java SE | 6.0 | 7.0 | x86 | x86 | x86 or x86-64 |
| Eclipse Platform | 3.5 | 3.7.2 | x86 | x86 | x86 or x86-64 |
| XULRunner | 1.9.2.19 | 1.9.2.19 | x86 | x86 | x86 or x86-64 |
Preparation to Requality installation
Eclipse installation
To install Eclipse unpack the archive to any convenient place. This creates an ''eclipse'' sub-directory.
If you use Java 7, turn on backward compatibility mode by adding the following string to the end of ''eclipse.ini'' file-Djava.util.Arrays.useLegacyMergeSort=true
Browser integration to Eclipse
Requality requires a browser engine to be integrated with Eclipse. Mozilla Foundation XULRunner and WebKit are supported.
Download XULRunner archive from http://ftp.mozilla.org/pub/mozilla.org/xulrunner/releases/1.9.2.19/runtimes/.
Unpack the archive to any convenient place and add the following string to the end of ''eclipse.ini'' file: -Dorg.eclipse.swt.browser.XULRunnerPath=<path to XULRunner>
For example, if XULRunner was unpacked to C:\xulrunner, the string should be:-Dorg.eclipse.swt.browser.XULRunnerPath=C:\xulrunner
Alternatively, on Linux you can use WebKit. To install it on Ubuntu you should install libwebkitgtk-1.0-0 package, e.g.:
sudo apt-get install libwebkitgtk-1.0-0
Installation of plugin for interaction with control version system
Version control system provides support for collobarative work with requirements. Check if there are plugins to interact with chosen version control system (Subversion, git and others) in Eclipse. If needed, appropriate plugin could be installed from Eclipse repository. In the case of Subversion it is recommended to use Subversive plugin (Subclipse plugin is not recommended).
Requality installation
Install
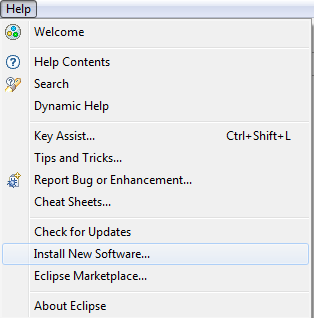
Install Requality by Eclipse Update Manager open Main menu and choose ''Install New Software...''
In opened window insert Requality update site address.
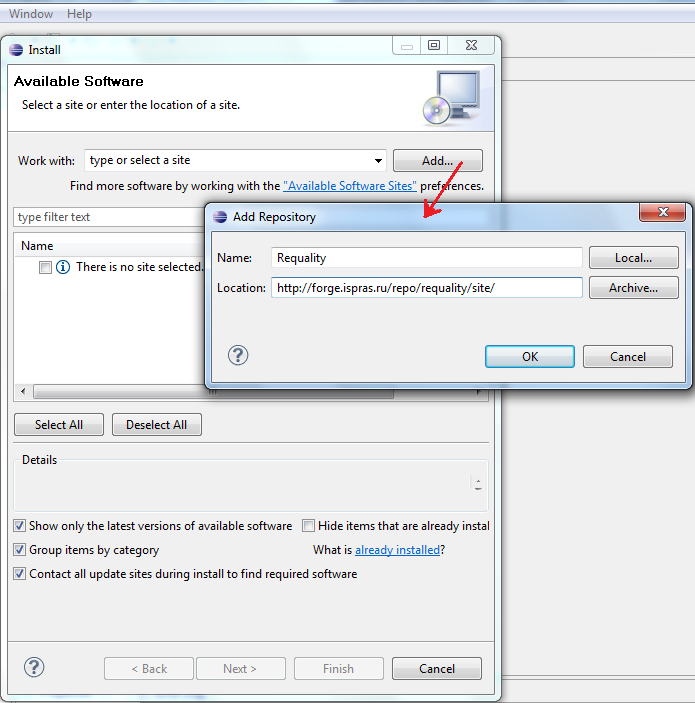
Name: Requality
Location: http://forge.ispras.ru/repo/requality/site/
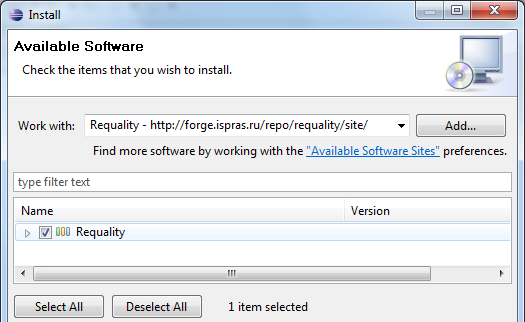
Then choose Requality plugin from the available plugins list and follow install plugin Wizard.
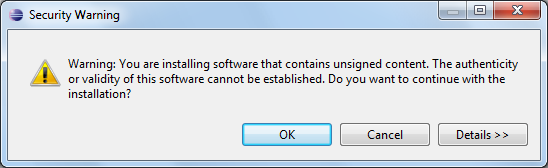
While installing there will appear Security Warning about unsigned content. Push ''OK''.
Restart Eclipse after installation.
For more information about installation of plugins from update sites see the following instructions.
Delete
To delete the plugin choose in menu Help -> About Eclipse. In the opened window (''About Eclipse'') push button ''Installation Details'', in ''Eclipse Installation Details'' window select required plugin - Requality, push ''Uninstall'' and continue deletion with the help of plugin delete wizard.
Restart Eclipse after deletion.
Update
To update Requality that was installed by Eclipse Update Manager choose in main menu Help -> Check for Updates. Wait until updates search finish. In the opened window (''Available Updates'') select Requality plugin and continue installation with the help of plugin update wizard.

There are 2 reasons why the plugin can not be in the list: the plugin is not installed or there are no updates.
To update Requality plugin, select it, click on the ''Next'' button and follow instructions.
Updated by Viktoria Kopach about 11 years ago · 33 revisions