System requirements
Windows and Linux (both x86 and x86-64) are supported. Please note if you use Windows x86-64, all the tools have to be x86 (32-bits), because there is no supported browser engine for Windows x86-64, that could be integrated into Eclipse.
| Dependency | Min version | Recommended version | Windows x86, x86-64 | Linux x86 | Linux x86-64 |
|---|---|---|---|---|---|
| Sun/Oracle Java SE | 6.0 | 7.0 | x86 | x86 | x86 or x86-64 |
| Eclipse Platform | 3.7.2 | 4.3.2 | x86 | x86 | x86 or x86-64 |
| XULRunner | 1.9.2.19 | 10.0.4 | x86 | x86 | x86 or x86-64 |
Preparation to Requality installation
Step 1. Eclipse installation
To install Eclipse unpack the archive to any convenient place. This creates an 'eclipse' sub-directory.
Step 2. Browser integration to Eclipse
Requality requires a browser engine to be integrated with Eclipse. Mozilla Foundation XULRunner and WebKit are supported.
NOTE! After Requality installation you can check if browser engine has been installed successfully. See instructions below in "After installation" section.
NOTE! To use XULRunner on Windows x86_64 install Visual C++ 2010 runtime
For Eclipse 4.4 on Linux it's necessary to use WebKit because of Eclipse 4.4 incompatibility with XULRunner. To install WebKit you should install libwebkitgtk-1.0-0. For example, on Ubuntu/Debian run in command line following command:
sudo apt-get install libwebkitgtk-1.0-0
For Eclipse 3.8 and higher to install Mozilla XULRunner it is required to download an appropriate XULRunner 10.0.4, to unpack the downloaded archive to any convenient place and to add the following strings to the end of 'eclipse.ini' file: -Dorg.eclipse.swt.browser.DefaultType=mozilla
-Dorg.eclipse.swt.browser.XULRunnerPath=<path to XULRunner>
For example, if XULRunner was unpacked to C:\xulrunner, the second string should be:-Dorg.eclipse.swt.browser.XULRunnerPath=C:\xulrunner
For Eclipse 3.7 follow the same instructions but use XULRunner 1.9.2.19. As long as XULRunner 1.9.2.19 is 32-bit only, on Linux x86-64 you should use WebKit as described above.
Step 3 (optional). Installation of plugin for interaction with control version system
Version control system provides support for collaborative work with requirements. Check if there are plugins to interact with chosen version control system (Subversion, git and others) in Eclipse. If needed, appropriate plugin could be installed from Eclipse repository. EGit is recommended. In the case of Subversion it is recommended to use Subversive plugin (Subclipse plugin is not recommended).
Requality installation
There are 2 ways to install the tool: using Eclipse Update Manager and using eclipse/dropins directory. The first one is recommended as long as it makes simpler to keep tools up-to-date. If you are using the tool in console mode or you have no Internet connection, dropins.
Installing Requality by Eclipse Update Manager (from update site)
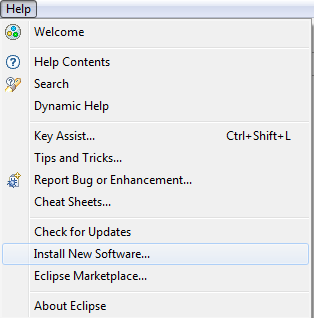
To install Requality by Eclipse Update Manager, open Main menu and choose 'Install New Software...'
Click on 'Add...' button. In opened window insert Requality update site address.
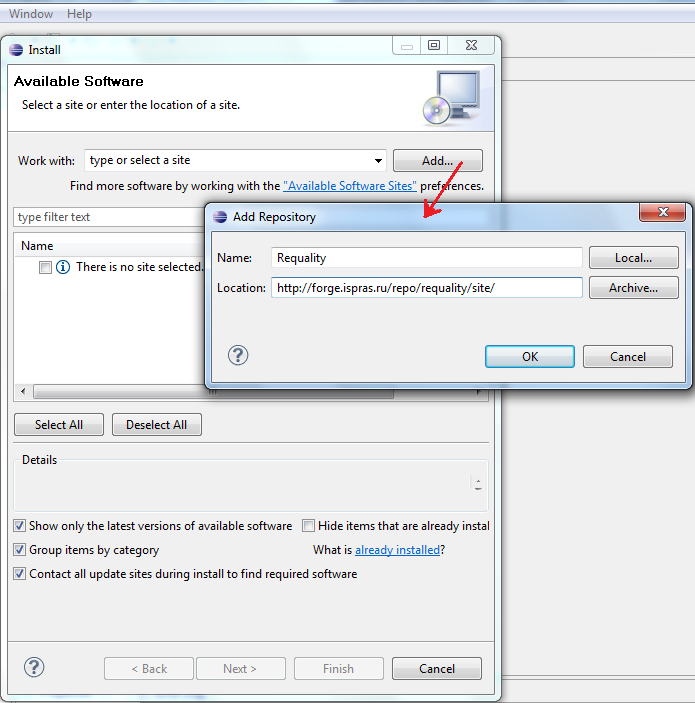
Name: Requality
Location: https://forge.ispras.ru/repo/requality/site/
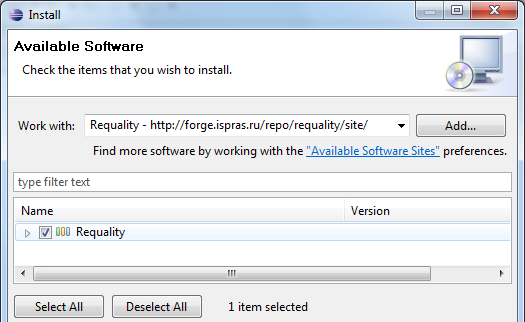
Then choose Requality plugin from the available plugins list and follow install plugin Wizard.
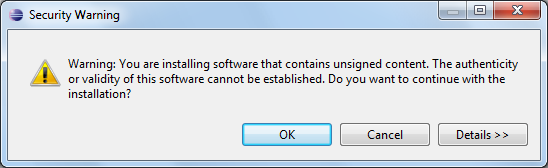
While installing there will appear Security Warning about unsigned content. Push 'OK'.
Restart Eclipse after installation.
For more information about installation of plugins from update sites see the following instructions.
Installing to dropins directory
To install Requality with all plugins download required archives and unpack a directory from every archive to eclipse/dropins directory. Every plugin has its own archive with a name in the format "pluginname-version.zip". Example:
requality-0-21.487-alpha-180518.zip
It's recommended to use plugins with the latest date of publication.
After installation
After Requality installation it's recommended to check if browser has been successfully installed to Eclipse.
In Eclipse main menu select 'Window -> Preferences'. In 'Preferences' select menu 'Requality'. On the right you can see what browser engines are integrated with 'Eclipse' and which one is currently in use.
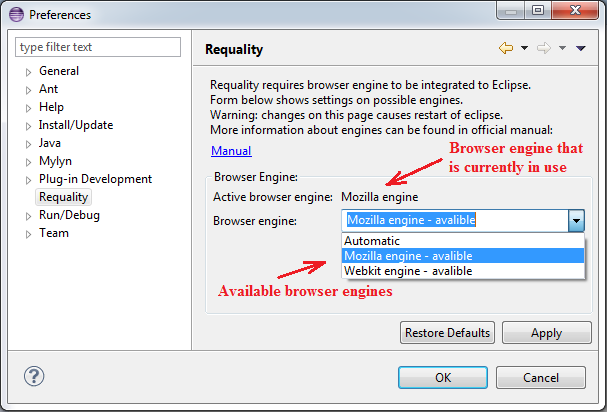
To change active browser engine click on 'Browser Engine' field and select required one in the drop-down list. Then save changes by 'Apply' button. After that Eclipse should be restarted for the changes to take effect.
If required browser engine has 'not available' status in the drop-down list, this means that either you have not installed it yet or the installation has been failed. You can activate only browser engine with status 'available'.
Updated by Viktoria Kopach almost 6 years ago · 33 revisions